Setting up pages
Contact your Account Manager if you don't have access to the Create pages feature.
Set up a new page
-
Set up a new page using one of the following options.
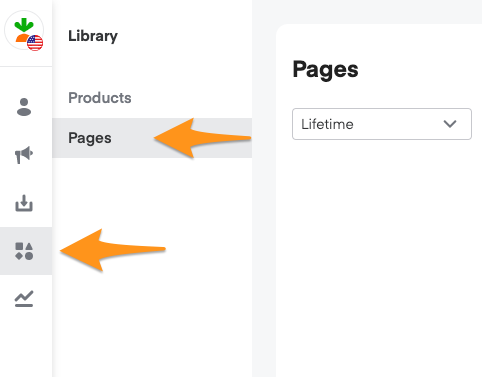
- In the left navigation bar, click Library, then Pages.
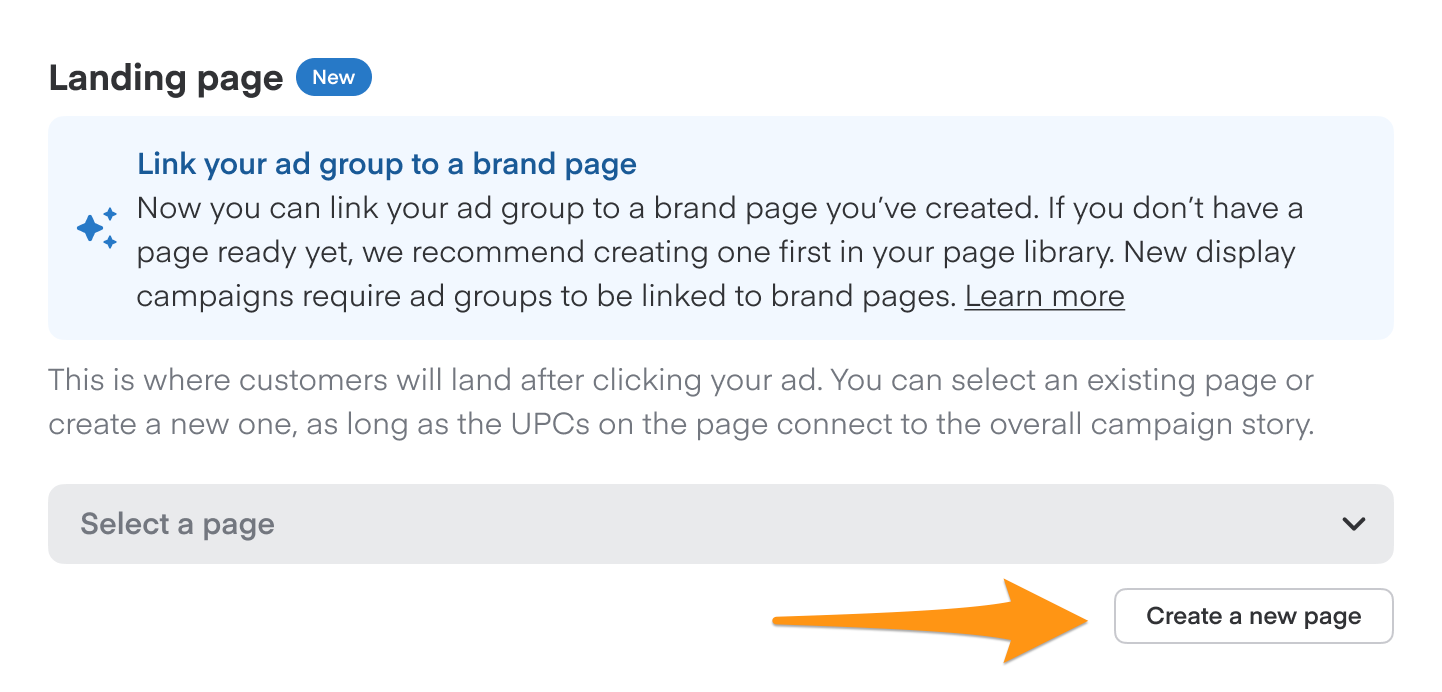
- From campaign creation, click Create a new page.
-
Click Brand story or Product collections to build your page from a template, or click Blank page.
We recommend using a template.
-
Click Next.
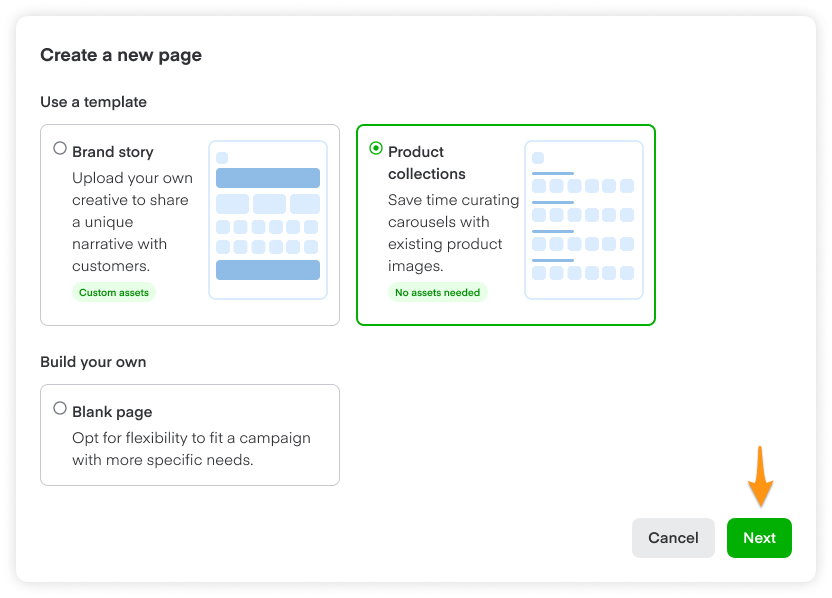
The rest of the page design process depends on which template you use, including the following.
Product collections
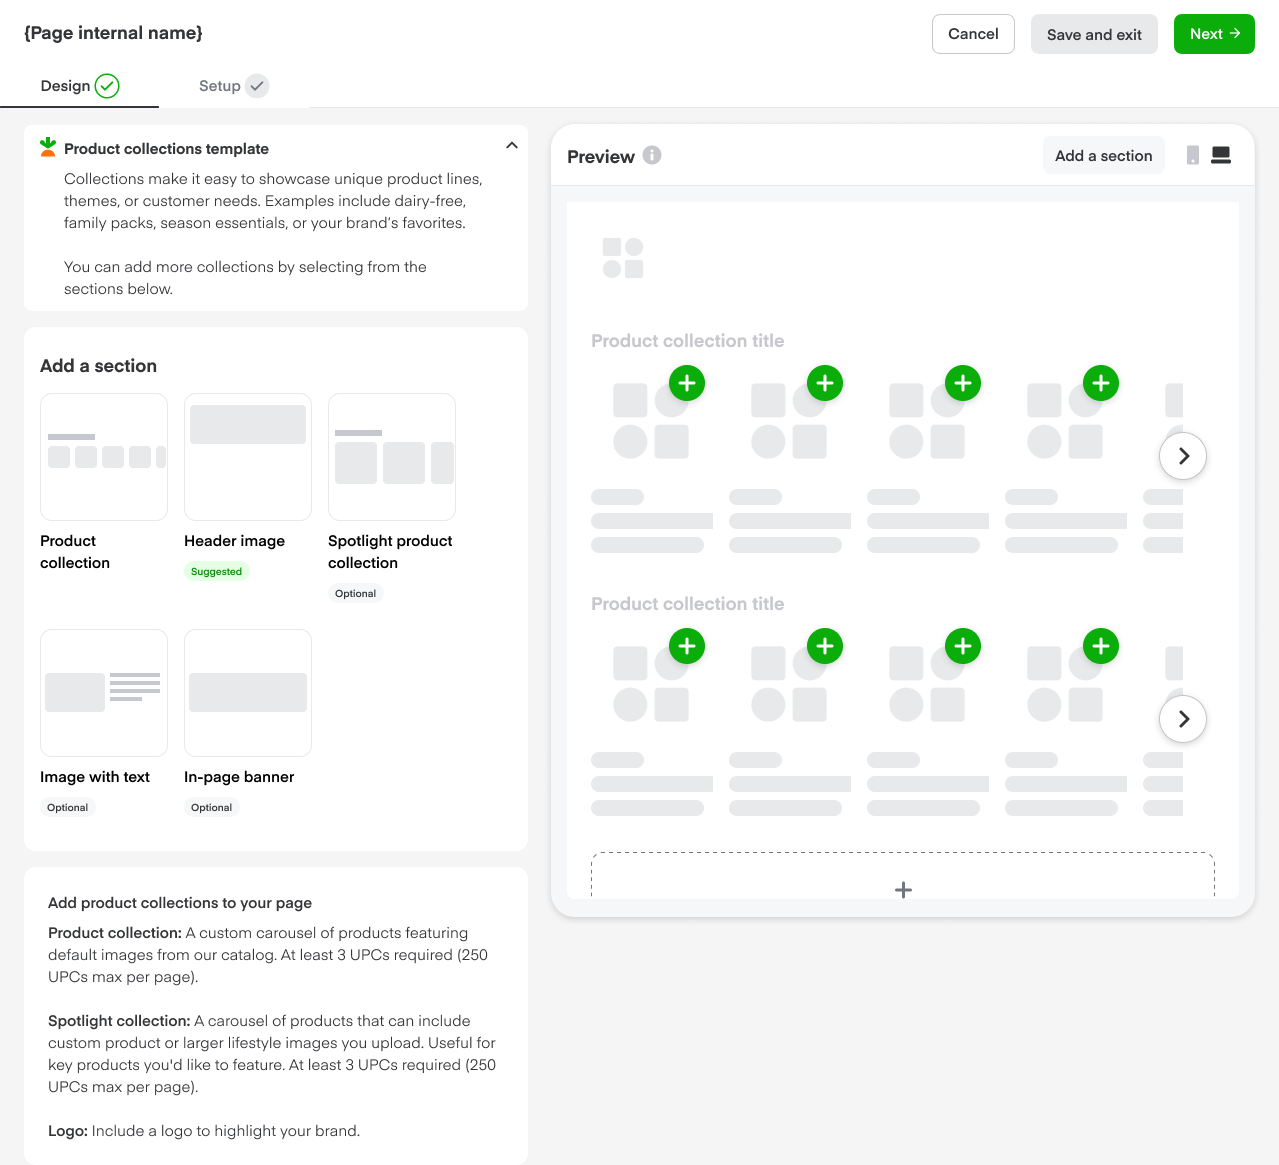
This template makes it easy to build item-forward pages with optional creative assets. It's designed for a fast implementation for e-commerce and emerging brand teams, optimized for sales-based campaign objectives.
We recommend organizing products into collections based on customer need (for example, dairy-free, family packs, season essentials, or your brand's favorites) to maximize basket size.
-
Add a Title and select up to 30 UPCs.
-
(Optional) Add additional Product collections to feature your full product suite.
-
(Optional) Add a logo to help drive brand recall.
-
Click Next.
Brand story template
This template is for brands who want to create an immersive post-click experience with engaging, branded creative. It helps reach campaign objectives.
-
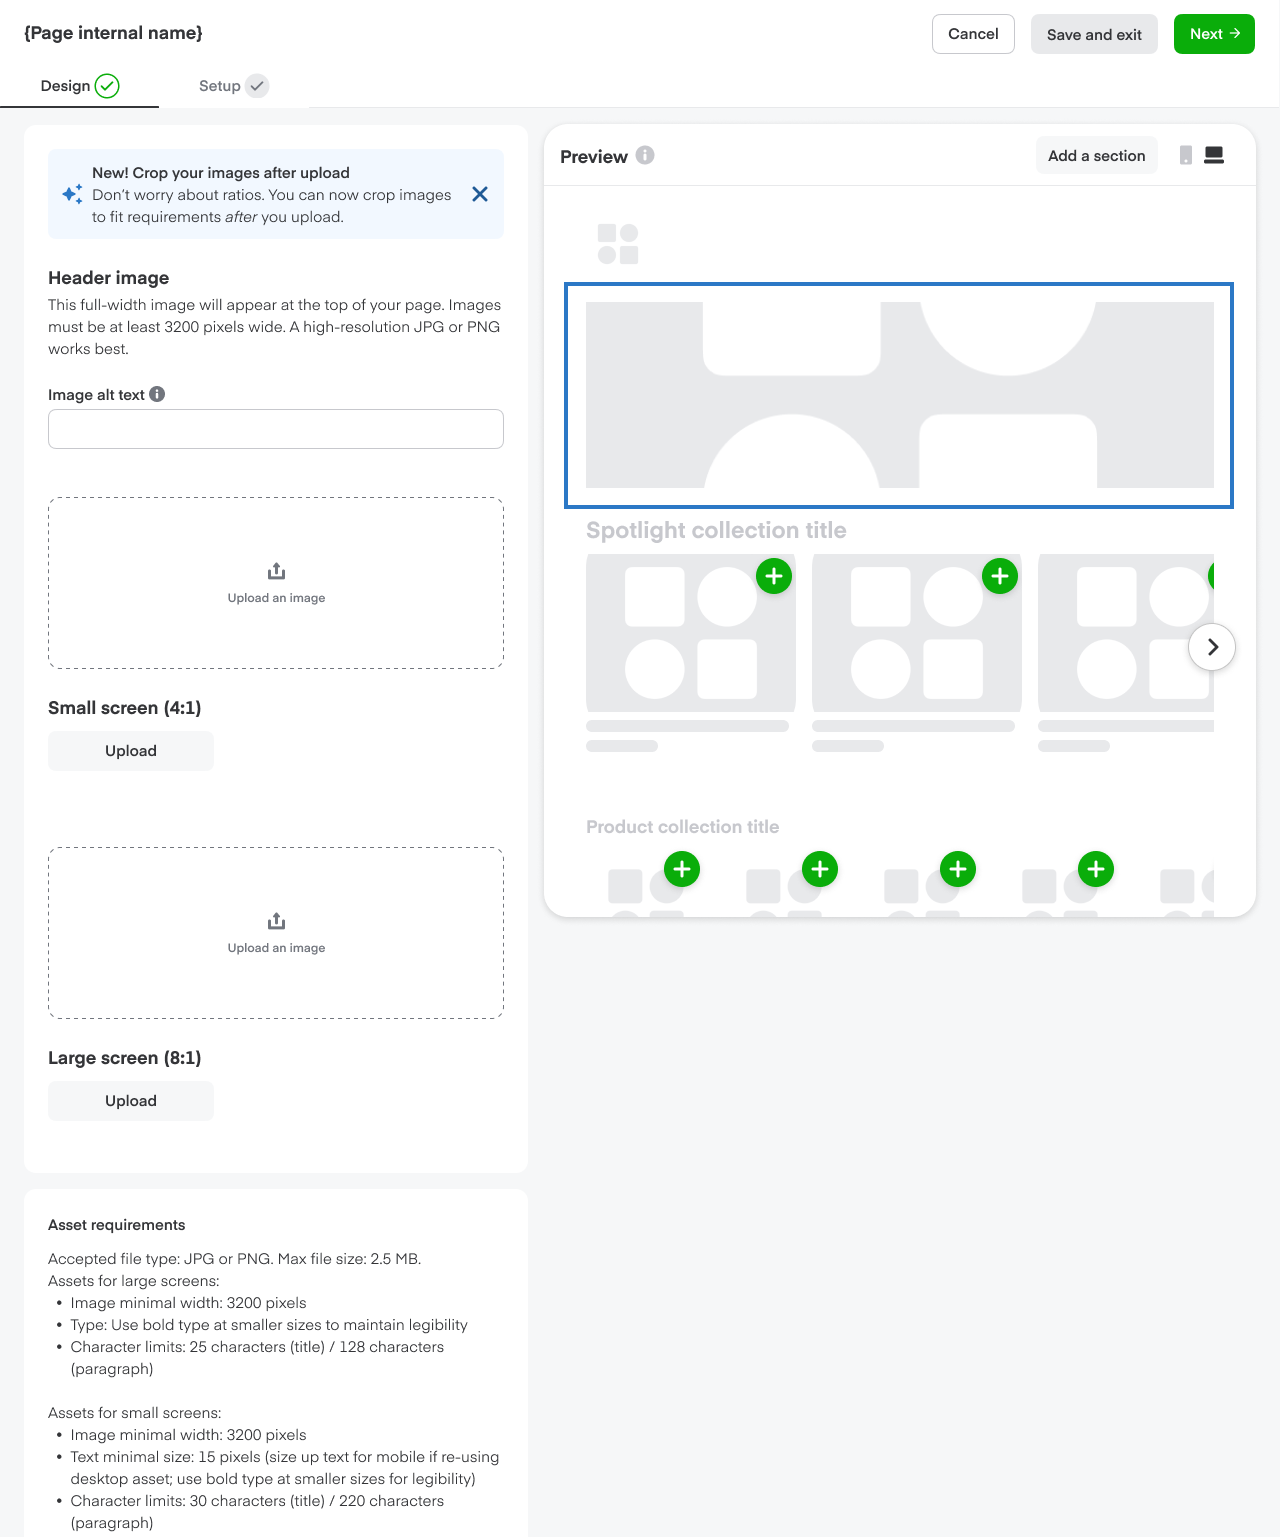
Upload a Logo and Header image.
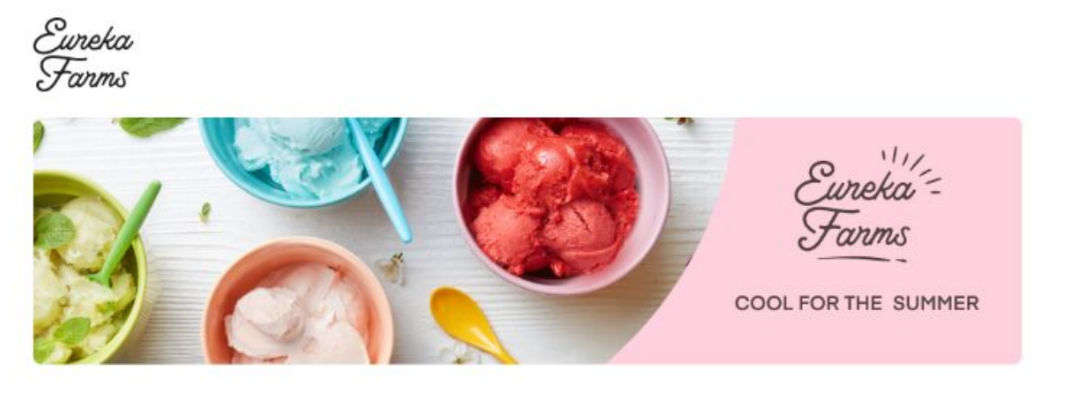
These assets appear at the top of your page to identify your brand and create a consistent user experience.
-
Enter alt text for your header image.
Alt text must include the product name(s) or brand(s) and clearly describe the image for consumers using screen readers.
-
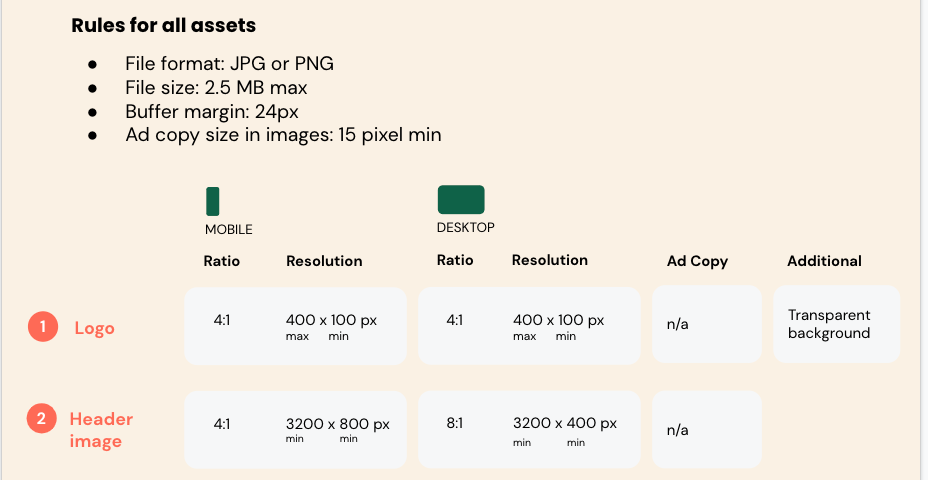
Confirm your logo and header image meet the asset requirements.
-
Use the built-in cropping tool to adjust the width and height of your image.
-
Click Next.
Blank page
A blank page allows you to create a completely customized page.
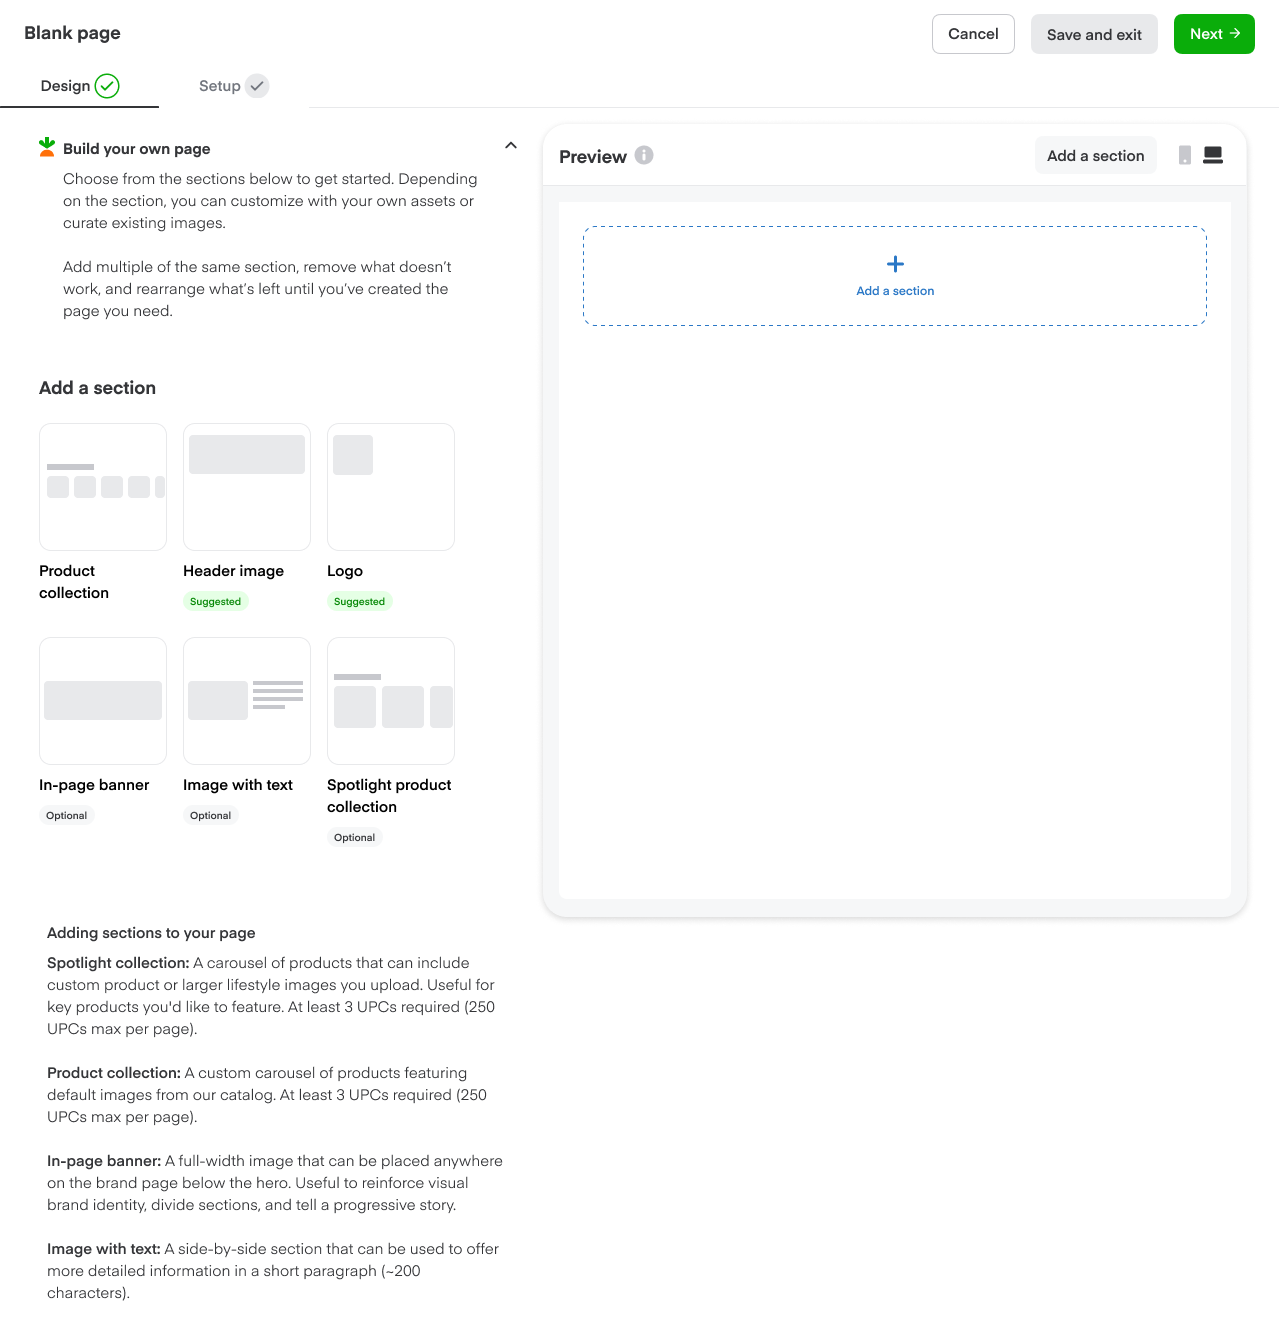
You can build your page from the following sections.
Add a spotlight product collection
Spotlight collections will be deprecated on September 21, 2026.
These collections feature larger product images in a carousel of 3-20 UPCs. You can upload product lifestyle images or use the standard product images from our catalog.
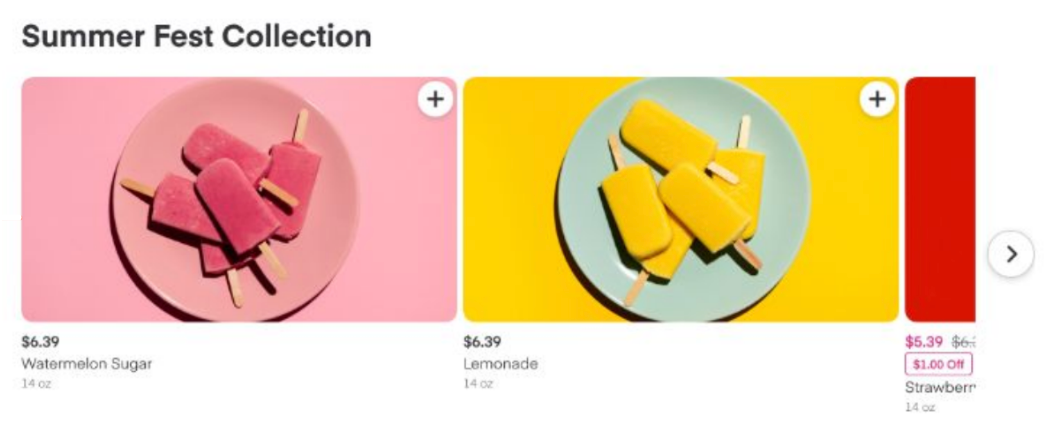
These lifestyle images only display on your brand page. The standard product images still display on other storefronts on Instacart.
-
In the preview pane, click the Spotlight product collection module.
If you don't see this module, click Add a section at the top of the preview pane and choose Spotlight product collection on the left side.
-
On the left, enter a title for your spotlight product collection.
-
Add your UPCs individually or in bulk.
-
Click Upload custom image to upload a lifestyle image for any UPC.
Lifestyle images must show the product. If you don't upload a lifestyle image, the UPC defaults to the standard product image from our catalog.
-
Use the built-in cropping tool to adjust the width and height of your image.
For a consistent user experience, we don't recommend uploading custom images for only some UPCs in a spotlight product collection. All UPCs should feature the same image type (either custom lifestyle or standard product images).
Add a product collection
Standard product collections feature products in a carousel. You can't upload custom product images.
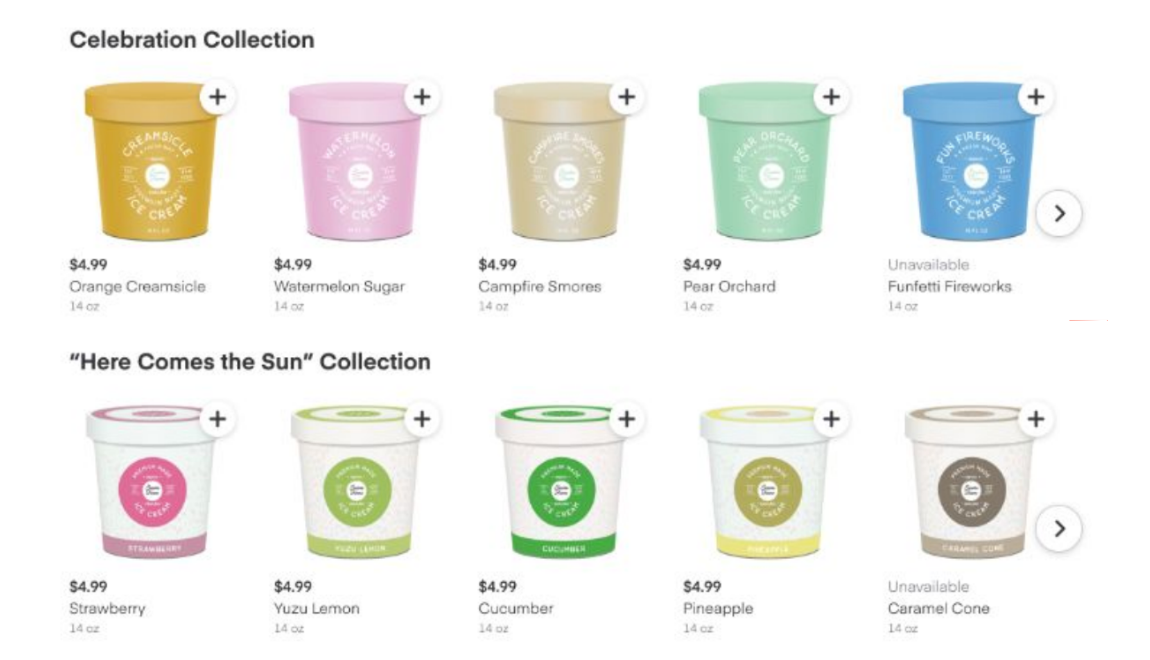
We recommend creating product collections for different themes or user needs.
- A collection of best sellers (best for evergreen campaigns).
- A collection of limited-time products (best for seasonal campaigns).
- Collections for different subcategories (for example, cereal, bars, and pastries on a breakfast themed page).
- Collections for different dietary preferences (for example, vegan, gluten free, etc.)
-
In the preview pane, click the Product collection module.
If you don't see this module, click Add a section at the top of the preview pane and choose Product collection on the left side.
-
On the left, enter a title for your product collection.
-
Add up to 30 UPCs individually or in bulk.
Add an in-page banner
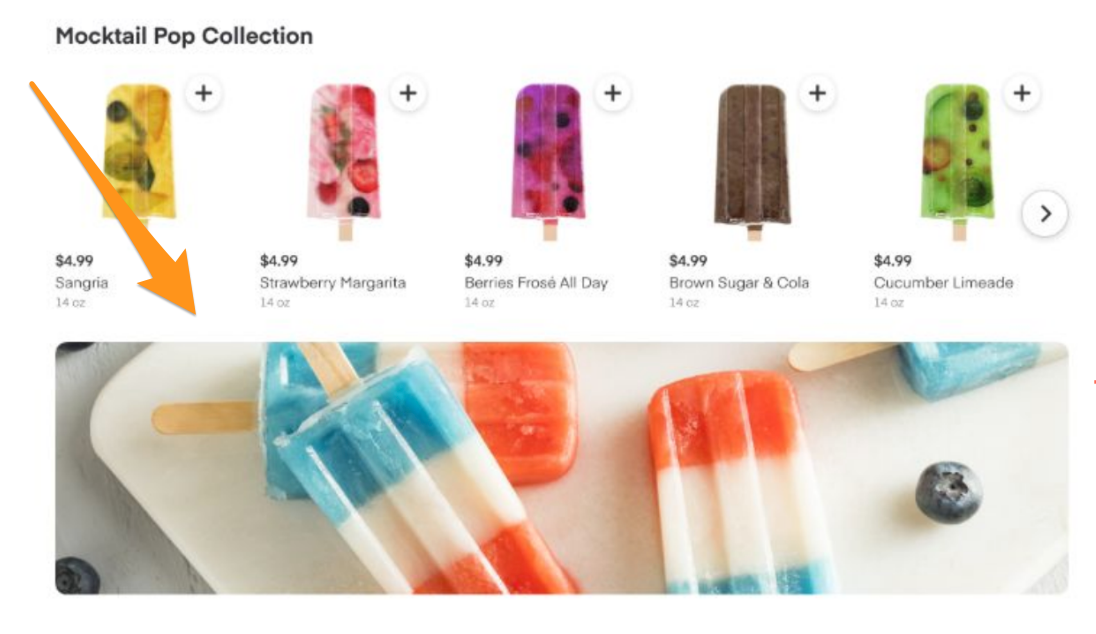
An in-page banner is a full-width image you can place anywhere on the page below the header image.
-
Scroll down on the preview pane and click the In-page banner module.
If you don't see this module, click Add a section at the top of the preview pane and choose In-page banner on the left side.
-
Enter alt text for your banner.
To see the alt text requirements, hover over the i icon.
-
Upload your large screen and small screen images.
The small-screen in-page banner aspect ratio is 16:9 (previously 4:5).
DeprecatedThe 16:9 ratio was introduced on August 31, 2026. The 4:5 ratio will be deprecated on November 11, 2026.
Use the built-in cropping tool to adjust the width and height of your images.
Add an image with text
An image with text includes an image next to a text section. This can convey more detailed information with a supporting graphic.
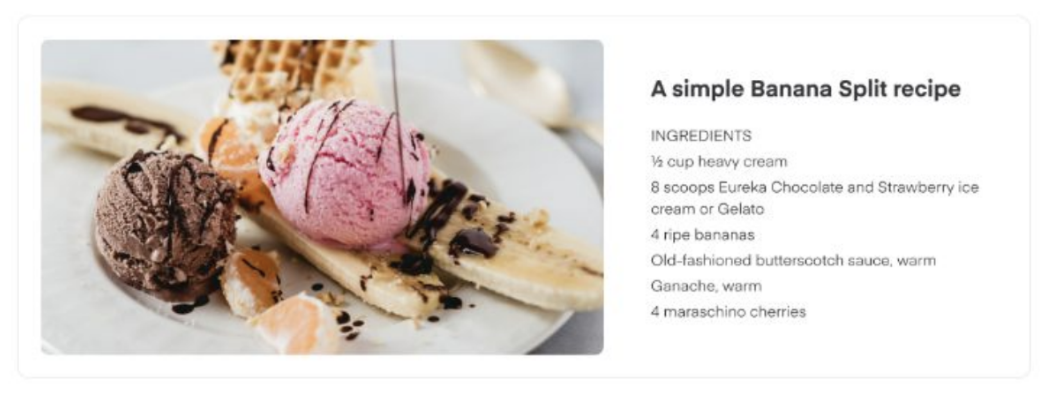
We recommend images with text sections for inspiring new use cases (for example, recipes or product hacks) or telling your brand story (for example, history, corporate sustainability, social impact).
-
Scroll down on the preview pane and click the Image and text banner module.
If you don't see this module, scroll to the bottom of the preview pane and click Add a section to add a new Image and text banner.
-
Enter alt text for your image.
To see the alt text requirements, hover over the i icon.
-
Upload your large screen and small screen images.
Use the built-in cropping tool to adjust the width and height of your images.
-
Enter a title and text for your banner.
Complete page setup
Complete the following steps after you finish designing your page.
-
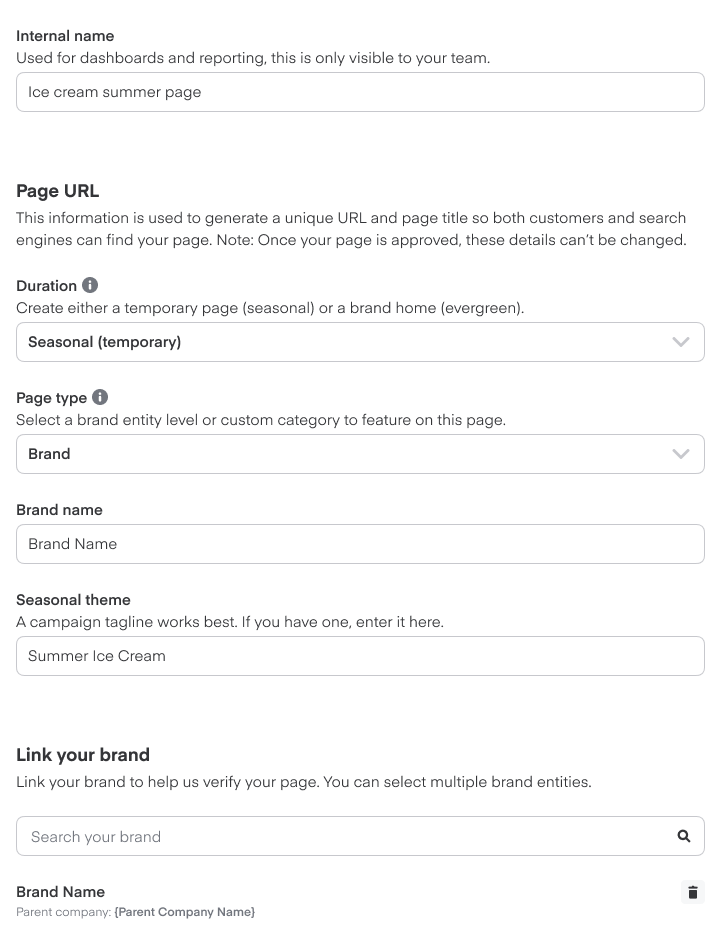
Choose the Duration (evergreen or seasonal) and Page type (brand, sub-brand, or custom category).
-
Enter your Brand name, Sub-brand name, or Parent company name.
Once you choose a brand, sub-brand, or parent company name, you must use the same naming structure on all your pages. For example, if you use California Pancake Company, you can't use CPC on another page. Consistent naming helps your pages index properly in search engines.
-
For seasonal pages only, enter your campaign tagline under Seasonal theme.
The page title and URL auto-generate based on your Brand name and Seasonal theme (if applicable). A URL and title preview appears on the right side of your screen.
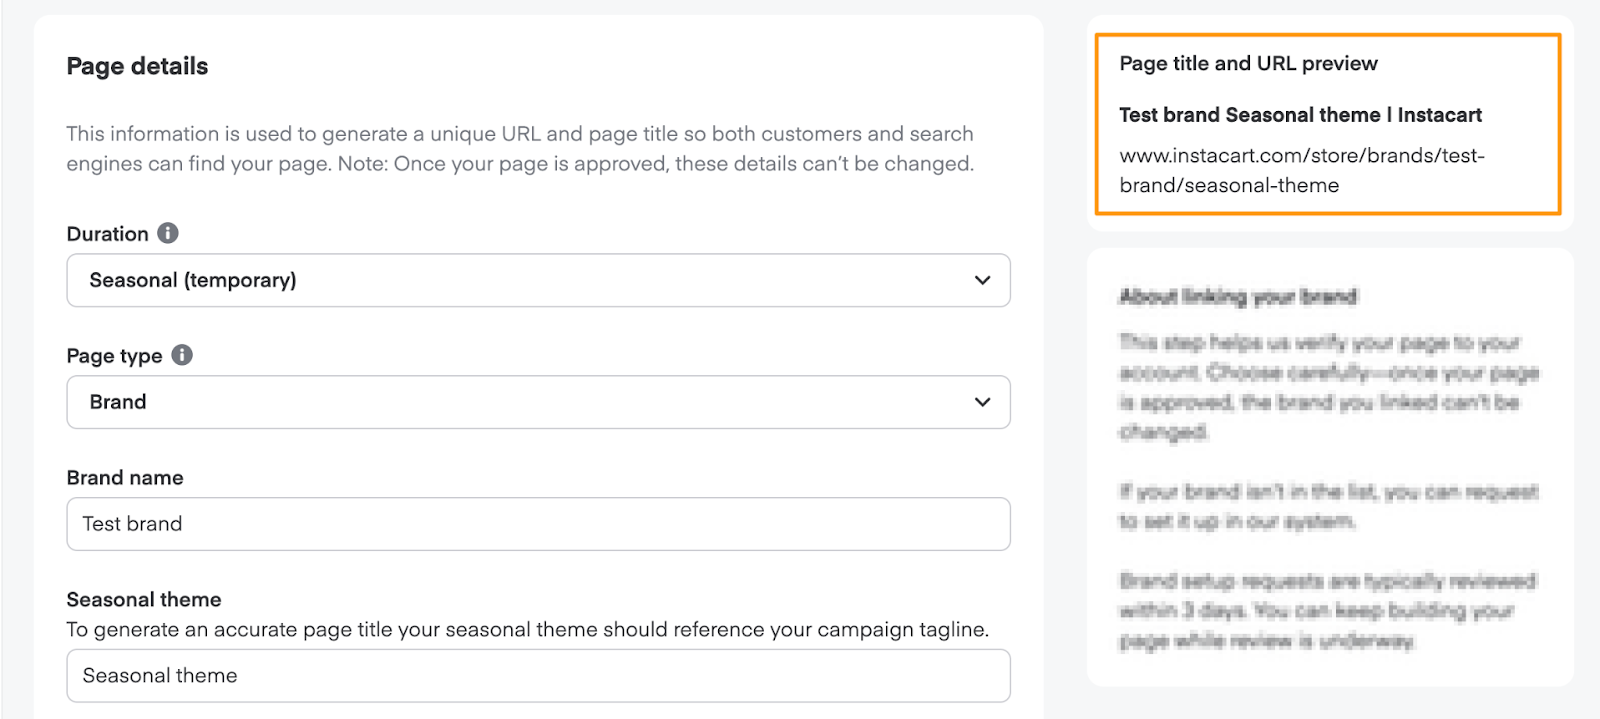
You can't update the URL once we approve your brand page. This prevents broken links and helps us provide the best user experience possible.
-
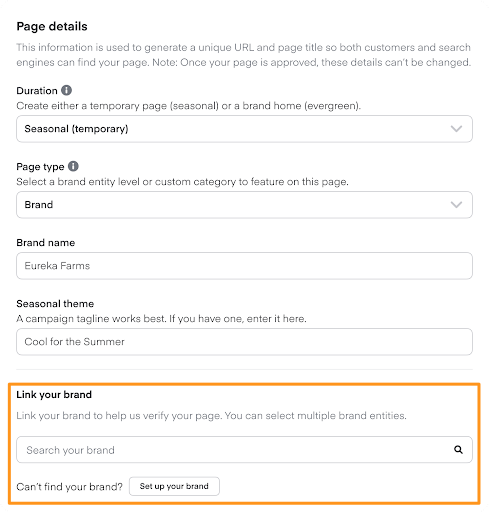
For brand and sub-brand pages only, link your brand by searching your brand name and choosing from the dropdown options. If you can't find your brand, choose Set up your brand.
-
Click Submit for review.